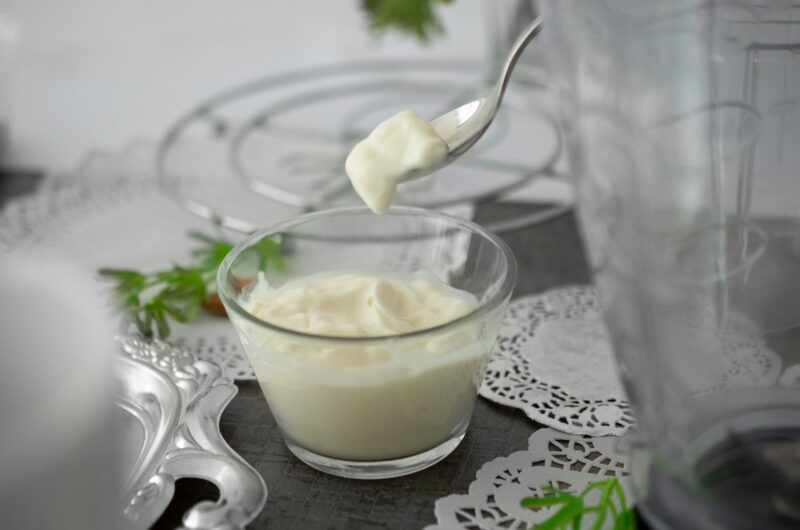
I’m excited to share with you how to transform our nutritious milk into delicious homemade raw milk yogurt.
This simple process preserves the natural goodness of raw milk while creating a versatile staple for your family’s table.
What You’ll Need for Raw Milk Yogurt
- 1/2 gallon of raw milk
- 2 tablespoons yogurt with active cultures
- 1/2 cup powdered milk (natural thickener)
- 2 glass jars (quart size)
- Instant Pot with yogurt setting (or a cooler with a heat pack or your oven)
Gentle Heating
We prefer not to heat our milk above 102°F so that we can preserve the natural flora, but that means the raw milk yogurt will not get as thick without powdered milk or some sort of thickener.
If you’d rather not use powdered milk, you can preheat your milk to 180°F and then cool it back down to 102°F before adding the yogurt cultures.
Rinse out your jars with hot water and place them in your instant pot with 1 cup of water at the bottom of the pot.
Divide your raw milk between the two jars.
You don’t need to heat it, because the Instant Pot will heat it.
Add Your Culture
Add 1 heaping tablespoon of cultured yogurt and 1/4 cup of powdered milk to each jar.
Once you have your yogurt going, you can just use previous batches to start a new one.
However, for best results, start fresh with a new culture after 8-10 batches to prevent increasing acidity.
I like to add a two squirts of stevia for sweetness and a tablespoon of vanilla to each jar for flavor.
Feel free to use your favorite sweetener instead (sugar, honey, maple syrup). I’d say1 tsp to 1 tbsp or to taste.
Incubation
Use the Normal Yogurt setting (90-100°F) and close the lid on the Instant Pot.
The Instant Pot won’t build up pressure, but it will keep anything from contaminating your yogurt.
Let your yogurt incubate for about 8-12 hours. Remember:
- Longer incubation = thicker, tangier yogurt
- Shorter incubation = thinner, sweeter yogurt
No Instant Pot?
If you don’t have an Instant Pot, you’ll need to bring your milk up to temperature on the stovetop and then place it in an insulated spot for 12-15 hours.
Before I got my Instant Pot, I would put a heat pack in a small cooler and put the jars in there for the incubation time.
Your oven could work as well.
Cooling
When you’re happy with the flavor, refrigerate your yogurt as quickly as possible.
The yogurt will continue to thicken as it cools, so judge your incubation endpoint by taste rather than texture.
Greek-Style Yogurt
Want a creamier, protein-rich version with less lactose? Try these extra steps:
1. Line a colander with butter muslin and place it over a bowl
2. Transfer your finished yogurt into the lined colander
3. Cover with another piece of muslin
4. Let it drain for several hours until it reaches your desired thickness
5. Store in a container in your refrigerator
Don’t waste the whey! This nutrient-rich liquid can be used in smoothies, soup stocks, for watering tomato plants, or as a treat for your chickens.
When I think about you taking time from your busy lives to create this simple food with your hands, it fills my heart with joy.
In a world that moves too quickly, these small acts connect us to something deeper—to the land, to our shared humanity, and to the generations who nourished their loved ones in just this way.
Have you made homemade yogurt before? How did it turn out?
How To Make Creamy Raw Milk Yogurt At Home
Course: Our Blog, Recipes8-10
servings10
minutes12
hoursTransform your raw milk into creamy yogurt with your Instant Pot.
Ingredients
1/2 gallon of raw milk
2 tablespoons yogurt with active cultures
1/2 cup powdered milk
Optional: 2 tsp stevia (or to taste)
2 tbsp vanilla extract
- Equipment
2 glass jars (quart size)
Instant Pot with yogurt setting (or cooler with heat pack, or oven)
Butter muslin (for Greek-style)
Colander (for Greek-style)
Directions
- Rinse the glass jars with hot water. Place jars in your Instant Pot with 1 cup of water at the bottom
- Divide the raw milk between the two jars. Add to each jar: 1 tablespoon of cultured yogurt,
1/4 cup of powdered milk, optional: two squirts (~1tsp) of liquid stevia and 1 tbsp vanilla for flavor - Close the Instant Pot lid (no pressure needed, but to keep it warm). Set to Normal Yogurt setting (90-100°F).
Let it incubate for 8-12 hours.
Without an Instant Pot:
Heat milk on the stovetop to 102°F. Place jars in a small cooler with a heat pack, or your oven
Incubate for 12-15 hours. - Once the desired flavor is reached, refrigerate immediately. Allow to cool completely (it will continue to thicken).
- For Greek Yogurt
- Line a colander with butter muslin. Place a colander over a bowl.
- Pour finished yogurt into the muslin. Cover with another piece of muslin. Let drain for several hours until the desired thickness.
- Transfer to a container and refrigerate. Save the whey for smoothies, soups, plants, or chickens.
Notes
- Longer incubation = thicker, tangier yogurt
Shorter incubation = thinner, sweeter yogurt - Judge final incubation by flavor rather than texture
- Once you have your yogurt going, you can use previous batches to start a new one. Start a new culture after 8-10 batches.


0 Comments